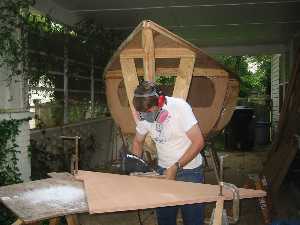
Now I start on the decks. I used the temporary shear batten to mark off templates. I then used the templates to cut mirror image templates. I installed these to check the fit. Here I've traced the templates on good plywood and cut it out. I'm smoothing the cuts. Notice that I am wearing hearing protection, eye protection, and a dustmask.
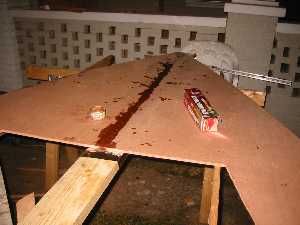
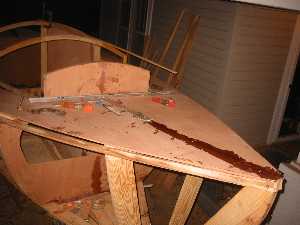
Now I join the deck halves. I really want to make sure the epoxy fills in the joint. All too frequently, if I just wet the plywood, it soaks the epoxy up leaving a gap and a very weak joint. I do the following:
- Lay out a plank on the sawhorses and wrap it with foil. This will keep epoxy from sticking to it.
- Fasten the starboard side down with drywall screws with about 1 foot spacing. Always fasten the ends first, then the middle.
- Wet out both sides with epoxy. Then smear thickened epoxy on the side fastened to the plank.
- Fasten the port side down. Install the drywall screws at an angle pointing toward the centerline.
- Pour additional epoxy on the joint. Check it the next couple of hours for a crack forming from all the epoxy being sucked into the wood. Pour on additional as necessary.
- Wait about 24 hours before removing the assembly from the plank. Some of the drywall screws will be submerged under epoxy. Never to fear. Heat a screwdriver with a blow torch, place the hot tip over the screw and push down. It will melt the epoxy and push it out the slots of the screw. Repeat as necessary until you can turn the screw loose. This will take a couple of minutes per screw.
I assembled the forward deck using the same method as the after deck.
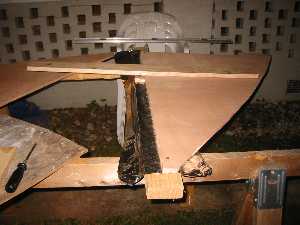
Here is the after deck with the #5 beam installed. I ran into problems with installing the #6 bronze screws to secure the beam. First I did not make the tapered holes deep enough and the screwdriver did not fit the head well enough for putting a lot of torque on the screw without chewing it up. I had to back out two chewed up screws and install new ones. Still the beam did not appear to fit tightly to the deck so I set up this clamp structure as shown.
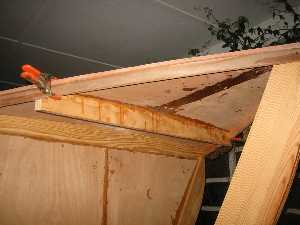
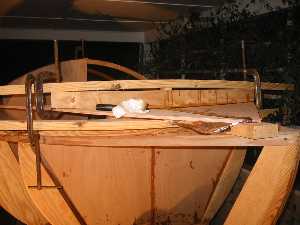
Here is the finished aft deck assembly with the #5 beam trimmed to accomodate the temporary shear batten.
The forward deck is placed on the boat for close fitting. I filed and filed and filed some more before quitting for the night.