Sails
Late last year I ordered a Sailrite kit from www.sailrite.com. These come with well written instructions and they can be sewn on a home sewing machine. Sailrite has kits for many boats including Elver. Starting sometime in January, I started sewing. This took about three weeks worth of nights and rainy or cold weekends over a period of about two months. I had some difficulties with my machine here and there, including instances of poor thread tension resulting in rats nest stitches. Once I tore out about a yards worth of such stitches while muttering a few unprintable words. However on the whole I enjoyed the process. As I worked I got quicker and more accurate. As far as I can tell the sails turned out ok.
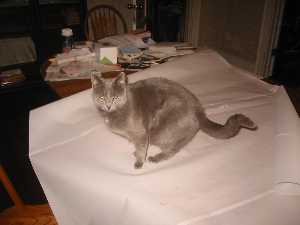
Whiskey helps out with the sewing, sometimes by holding the sail in place on the table as I sew. Sometimes he goes for a ride as I push the cloth through the machine.
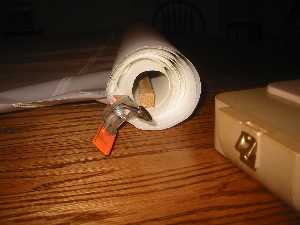
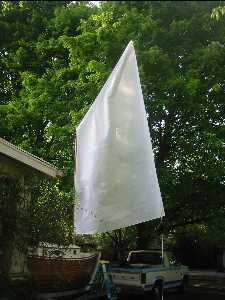
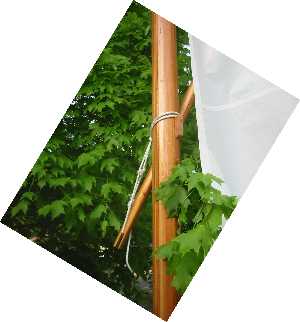
In order to manage the large mainsail I rolled it up using a long cedar stick left over from strip planking in the middle. I used a small clamp to hold the roll in place.
Sprit Rig
The Elver plans specify a so called "Sprit Rig". This rig is simple, low cost, requires a minimum of hardware but it is different from what is normally seen on a sailboat. I was fascinated by this rig for these reasons. The following pictures show various aspects of the sprit rig.
Here the mizzen is deployed. This is a lug rig. I attached the sail to the yard (top angled spar) using a series of ties. For the roband I used a loop of line loosely surrounding the mizzen mast and firmly tied to the yard. I attached the sprit (lower spar) to the tack by sticking the shouldered end through the grommet. I ran a small snotter from a grommet above the clew through the slot in the sprit and back to a loop on the mizzen. I tied the clew to the mizzen mast using a loose loop of line. Finally, I ran the mizzen sheet through a small block that was tied to the boomkin and tied it off to the docking cleat.
For stowage at anchor, I just bundle the sail up with the yard and sprit, then secure it by tieing the mizzen sheet around.
Here is a detail of the snotter on the mizzen. With this arrangement the weight of the sprit helps give the sail the proper shape.
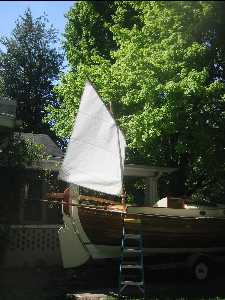
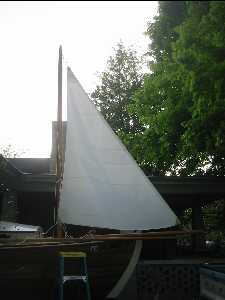
At this point I deployed the main. At first, I rigged the main too loose, resulting in a big wrinkle running down the sail. I realized that I had made the sprit too thick for the shoulder end to stick through the peak grommet so I tied it on with a short line. I was thinking I had to add an extra foot to the main sprit. Instead, I adjusted things by planing and filing down the sprit and then tightening the throat to the bee hole in the top of the mainmast. After that the sail fit perfectly. I worked through how I would raise and lower the sail, scandalize it, and rig it at the boat ramp.
Scandalizing is a means of quickly reefing the main by removing the sprit. The sail immediately assumes a triangle shape. As a result the area of the sail is cut down by about 60% and the center of effort is lowered.

Here is a detail of attaching the clew to the mast. I may go to a hook arrangement for quick attachment and removal.
I bought some cheap cleats at the hardware store. Once I figure out how I want my cleats to be after a few sails I will get good quality bronze cleats.
I am really amazed by how little hardware this rig requires. Two cleats, two blocks and two snap hooks for everything.
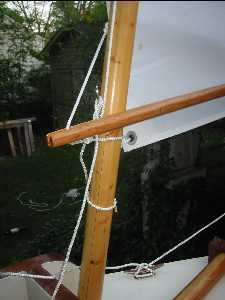
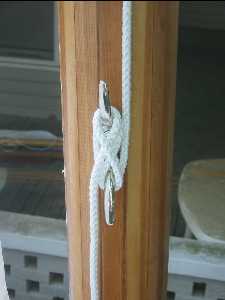
Here is the snotter and thumb cleat shown. I tied this as specified in the plans except for the metal thimble.
When I did this it was windy. The boat quivered in the trailer and seemed to be itching to come alive.
Also the big maple tree precluded rigging the sails all at once so I had to do one at a time and move the boat around to accommodate.
Here is the jib. I tied the jib halyard to the jib and ran it through a block tied to the top of the mast.
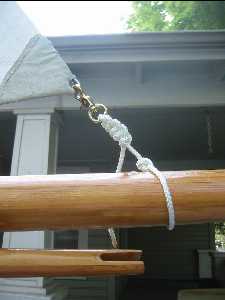
I tied a loop of line with a hook to the bowsprit so that I could attach the jib quickly.