Portlights
Building the portlights has been an interesting process. Earlier on 11-1-3 I described a way to construct the portholes. I proceeded on this approach to the point of constructing one porthole. I didn't like the result because:
- The wood was cut unevenly. The jigsaw I bought for this turned out to be crappy.
- I would have to flex it to fit the side portlights
- There was no easy way to fasten in place short of glueing
- It would be difficult to replace the glass in the future
My research into standard practices for building portholes revealed that I should cut a rabbet on the inside rim of the portlight to mount the glass and putty it in place. However the thickness of the cabin is only 3/8" thick which is the plan thickness. Bronze portlights are cost prohibitive and heavy. I could not find plastic elliptical portlights. I needed another way to fasten the glass in place that would keep it secure and allow easy removal in the future. Here follows what I did.
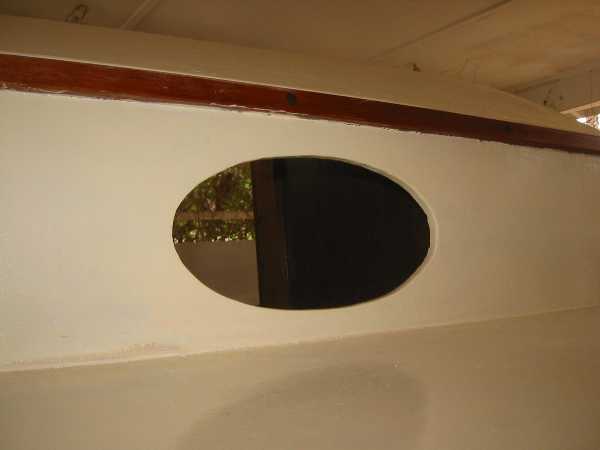
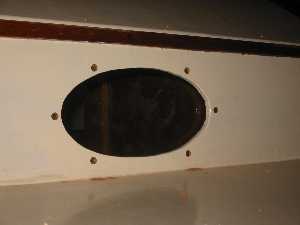
Here is the look I desired in the portlight - just a plain opening.

I started with this template. I needed a way of positioning holes in the glass and in the wood that would line up within a close tolerance. Here I drill holes in an oval that I just cut.
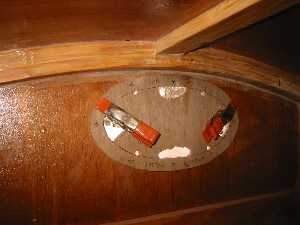
I then clamp the template to the portlight opening. The sector holes are to help me line up and clamp it in place. I then drilled all the holes in the cabin side.
All the holes are drilled. I use 8 holes for the front and 6 for the sides.
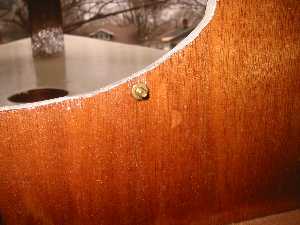
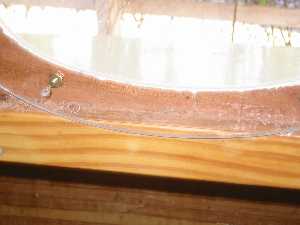
Here I've installed a screw. I used a 3/4" #10 brass slot head machine screw. I countersunk the screw so that the head is 1/16" below the surface. On the inside the screw forms a 7/16" high stud that will accept a nut to hold the glass in place.

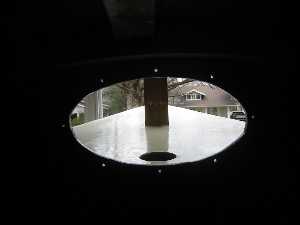
Here is what the portlight will look like on the inside. Once the inside of the cabin is painted I will use either 3M 4200 or polysulphide or butyl to seal the edge and tighten the nuts down.
For the side portlights the glass oval extends above and below the framework. I must trim this part off so it sits inside. As it turns out I must trim each one slightly differently.
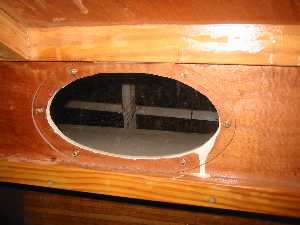
Here is what the side portlight will look like from the inside.
When it gets warmer, I will paste these holes over with thickened epoxy, sand, prime, and paint to completely hide the screw heads.