Solar panel
The battery combiner setup worked fine in that there were no further instances of a flat battery. But there was still a problem with keeping the house battery charged. On most sailing trips I will run the diesel for about 15 or 20 minutes to get out of the marina and a similar amount of time upon return. The ammeter on the alternator output shows about 10 amps right after starting the motor but it drops down to 5 amps after a few minutes. Thus an outing may get me 5 amp hours of charge. I think that most of this goes to replenishing the starting battery. It may also be that the battery is near the top of its bulk charge. This is really inadequate considering that other times I just hang out on the boat and run the stereo and cabin lights. Sometimes while sailing I use the Autohelm, VHF, depth sounder, engine compartment light, running lights, steamer light, anchor light, and very occasionally the spreader lights. All of these take power and the battery gradually runs down. I have a 10 amp 3 stage portable plugin charger which I hooked up to shore power to help charge the battery every couple of weeks. But this was a chore that I would like to eliminate having to do.
The next step of the game was to put a solar panel. I needed a panel that was rugged enough to be stepped on and not break. I had to have it secured well so it would not blow off. Also the panel mount had to shed water so it would not rot. Importantly the solar panel had to be mounted somehow so that it would fit the character of the boat aesthetically and not be too conspicuous.
This all together seemed a tall order. I pondered the size and mounting issue for a while. One day as I was perusing the Wooden Boat Forum I found my answer in a picture of the William Garden Eel "Pick Pocket" taken at the 2007 Port Townsend Wooden Boat Festival. On her stern was mounted a small solar panel in a wooden frame. The solar panel appeared to be about one foot square in the photograph. Importantly, it seemed to fit with the great looks of this boat. I had previously estimated that I needed a panel of around 12 to 15 watts. From there I quickly proceeded to select and order a 11x13" vandal resistant 12 watt panel from the Alternative Energy Store.
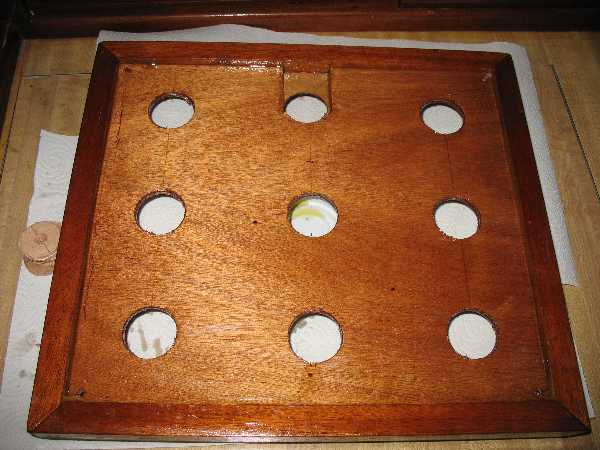
I then built this is a frame similar to the one on the Eel. It is lower in profile so the companionway hatch can slide over it. The top of the cabin has a slight crown but the bottom of the frame is flat. This permits a 1/4" gap for water to flow out and air to circulate. The holes allow any water that would otherwise sit under the solar panel to run out. I finished the inside with a couple of coats of WEST epoxy and several coats of varnish.
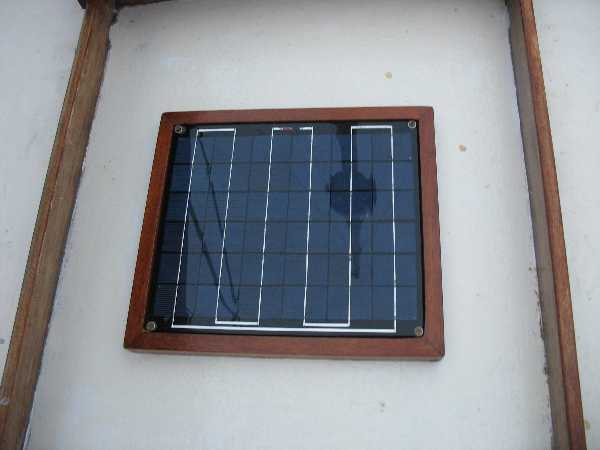
Here the finished panel sits in its location. It's mounted so that it can withstand being stepped on and will not be readily kicked or washed off.
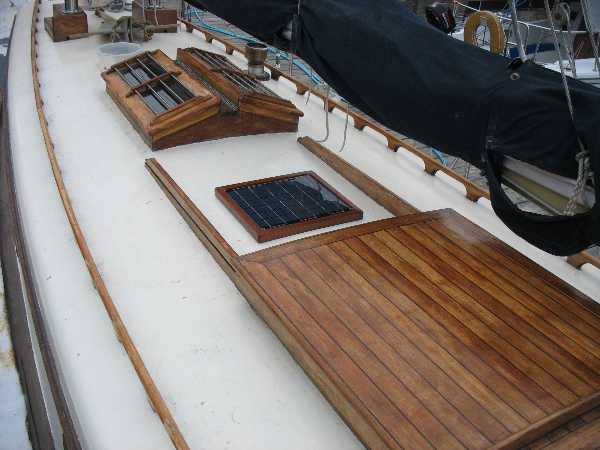
Here's how the finished panel appearance fits in with the rest of the boat.
The output of the solar panel is up to 19v around noon on a bright sunny day. It gradually drops off as the day progresses and the daylight diminishes. The voltage also drops as more current is drawn from the panel. But the battery requires a specific voltage to charge properly. In order to convert the solar panel output to that which is suitable for the battery a charge controller is required.
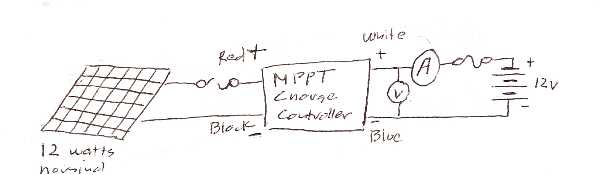
Here is the circuit I needed
At the same time I bought the solar panel I purchased a MPPT type charge controller. The details of the MPPT charge controller are covered elsewhere on the web. Basically MPPT means maximum power point transfer. This means that it draws current from the panel in such a way that the wattage which is the product of the voltage and current is maximized. It then steps this down to a voltage appropriate for charging the battery. It monitors the output voltage so as not to over charge the battery. This panel can collect 5 amp hours of charge on a clear, sunny day. Over the work week that means it collects up to 25 amp hours.
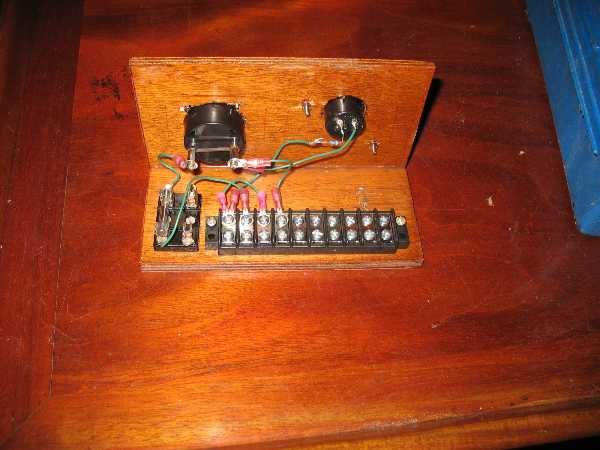
Since this was somewhat experimental to me, I added some guages to monitor the output and some fuses to protect the system. I built a crude mount that I screwed into the overhead. I found that when it is sunny and the battery needs charging this puts out up to almost an amp. As the battery approaches full charge it puts out less.
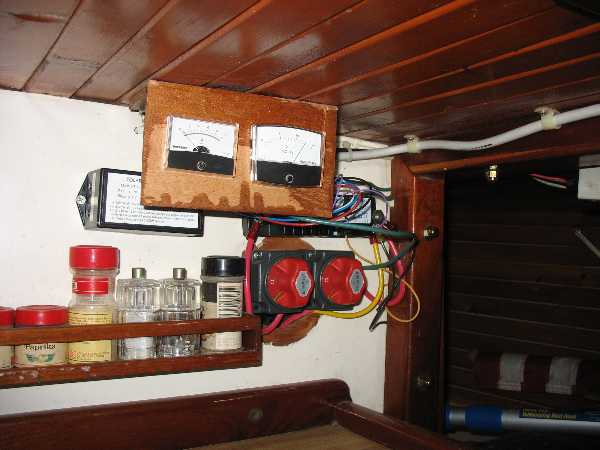
I then hooked everything up. The output of the charge controller goes through an ammeter and a fuse directly to the positive terminal of the house battery. The ground is connected to the negative terminal. The voltmeter is connected from the positive to the ground. It operates even when the switches are off as shown in the picture. The MPPT charge controller is mounted to the bulkhead behind the guage panel. It has a red light on the side that illuminates while it is operating.
After a few months of operation the results are quite positive. Each time I visit the boat I find that the house battery is fully charged. I checked the electrolyte level in the battery and found it satisfactory. I don't have to worry so much about running lights, stereo, and the various electronics anymore.