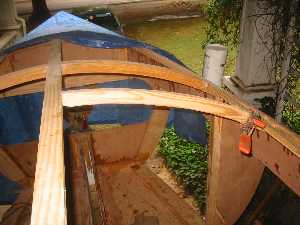
Today I did various things like fitting cockpit coaming, starting the roof, and plotting the portlights. What I cover here in detail is building the arch piece that is to form the front edge of the hatch.
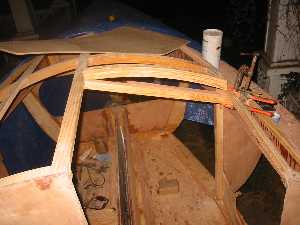
Here I've worked out how I am going to build the hatch frame.
I went to Home Depot and bought some more southern yellow prime. I was thinking I was going to saw this piece and make it an actual piece of the boat. After fitting it I got to thinking that I would rather match the arches. So it became a pattern. What I'm about to do deviates slightly from the published plans but I decided I wanted a piece that matches the others that I did before. This framing member has a slightly bigger cross section than what is shown in the plans but it should be just as strong, if not stronger, because it has a 1 1/2" by 1 1/2" cross section. The plans seem to show a 3/4" wide by 1 1/2" high cross section.
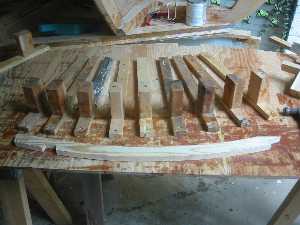
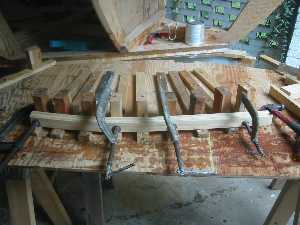
The following pictures show how I do a laminated arch. First I set a bunch of stops on a piece of plywood in the desired shape. The sawn piece is the pattern that I am matching the curve of.
I had on hand plenty of laminating stock from previous work. If not I would get out the tablesaw, set the blade guard to 1/8" and rip out some. Then I cut the stock to the desired length and made up enough pieces for the thickness specified by the pattern.
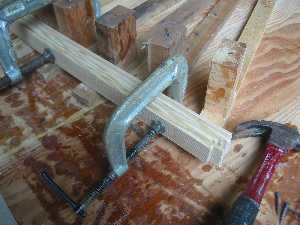
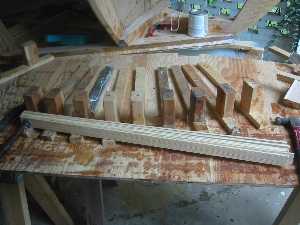
Here I am starting my dry run for gluing up the lamination. I like to rehearse this so I can anticipate and deal with any problems before the actual gluing. Shown here is a technique I use to avoid gaps in the laminate. I first clamp the end to the form. Then I place this clamp on the near end as shown while the lamination is straight. As I bend the laminate stack around the form, the outer pieces tighten against the inner ones, avoiding gaps.
I'm clamping things up.

Everything is clamped up. I decided to add an extra clamp and move my big one to the end. I wanted all the handles to tighten freely without sliding the handle. Usually a clamp has a freely sliding handle. But, many of mine are so gummed up with epoxy that they can't slide very well.
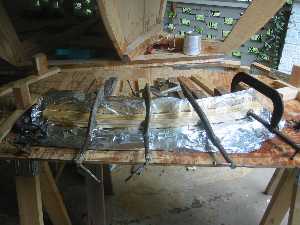
Here I have epoxied the stack and clamped it down good. I spread epoxy on both surfaces of each lamination so it gets wet out well. Using too little epoxy is almost as bad as not using any at all since the southern yellow pine tdnds to drink up a lot of epoxy before becoming saturated. The joint could get starved. The tin foil is for keeping the piece from adhering to the form.
Once I had the pattern it took less than an hour to gather the laminating stock, set up the form, and glue it up.